Mfr Part # 4600
QT PY SAMD21 WITH STEMMA QT
Adafruit Industries LLC
License: See Original Project LEDs / Discrete / Modules
Courtesy of Adafruit
Guide by Erin St Blaine
Overview
Cafe-style light strands with Edison bulbs are a beautiful way to decorate your patio. They are a fantastic and classy way to light up any outdoor space. Wineries, bistros, and night markets use them to create a cozy, intimately lit space that's warm and inviting to diners, and they look fabulous in backyards of just about any size.
These lights are a programmable, addressable version of the cafe market lights you can find at the hardware store. Add Arduino or CircuitPython code and you can turn your lights on in party mode, sending warm rainbow animations across your yard.
These lights require 12v power, and also need to hold up in an outdoor environment. This guide will focus on how to power a 5v microcontroller and 12v lights from the same setup, and also show how to use a waterproof enclosure to keep your lights safe from rain and weather.
These are 12v lights with 50cm spacing between them. Each strand has 30 bulbs and they come with waterproof connectors on each end.
I got them from Ray Wu's store on AliExpress, which had the best deal I could find for this kind of light. They are available in different spacings and different voltages - be sure you get the 12v kind and not the 24v for the scope of this guide.
I plugged 4 strands into a daisy-chain, for a total of 120 lights, without a noticeable voltage drop.
Additional Parts Needed
These lights require 12v power, but our microcontrollers need 5v power. This DC Power BFF is what we need. It can receive and deliver 12v power through its screw terminal port and 2.1mm jack, and at the same time, deliver 5v power to the microcontroller through the headers.
Since this is an outdoor installation, it's a good idea to place the electronics inside a weatherproof box to protect them from the elements. This box is just the right size and has two cable glands for passing power and data wires.
Power Supply
These lights require a 12v power supply. We have a few in the shop which are great for indoor installations, but if you're putting these out in the garden it's a good idea to look for an outdoor 12v power supply.
Here's the one I ended up using. It's made for landscape lighting, so it's completely weather-proof, and it has some cool additional features like a built-in timer and an automatic light sensor that turns your lights on at sunset.
This one is rated for 60W, which is way more than I need for this strand of lights, but since I am planning on adding additional landscape lighting to my yard, I went with a solution that will allow for some expansion.
Depending on your power supply and setup, you may find it handy to pick up a couple of screw terminals. This male one fits into the Power BFF.
Tools & Additional Materials
Wiring Diagram
The power BFF stacks on top of the QT Py using the included female headers.
The data pin from the LEDs is connected to the yellow stemma wire (SCL) and plugs into the QT Py via the Stemma port.
The LED strand and the power supply's power and ground wires both get connected to the Power BFF.
In this diagram the LEDs are wired into the screw terminals and the power supply is plugged into the 2.1mm jack. As long as both are connected, these two ports are interchangeable, so use whichever makes sense with your power supply.
Software
The QT Py is compatible with Arduino and with CircuitPython, so you have plenty of options when it comes to coding your lights.
Here are some guides with sample code that can get you started. You may need to make a few changes to the code samples, but these projects can fairly easily be modified to work on the QT Py.
Or head to the next page for a step-by-step guide to installing a beautiful animation using Arduino.
Arduino Code
This code example uses the FastLED library and is modified from a sketch called DesignerPalettes by Mark Kriegsman.
It's a great idea to get your software all set up and loaded onto your board right away, to make testing your connections easier later on.
To get the code running you'll need:
1. Arduino IDE
If you’re not using a recent version of the Arduino IDE, this would be a good time to upgrade. If this is your first time using Arduino, head over to this guide to get it installed. It's free and fairly simple to get set up.
2. Board Support
You'll need to tell the Arduino IDE which board you're using. This takes just a few minutes of setup, and you'll only need to do it once.
Here is a step-by-step tutorial for setting up QT Py
3. Libraries
Both libraries can be installed using the Arduino Library Manager — use Sketch → Include Library → Manage Libraries… and search for all or part of the library’s name, then click “Install.”
Look for:
Adafruit_NeoPixel isn’t absolutely required for this project, but it’s handy to have installed in case you have problems with FastLED. Troubleshooting the basics is a little easier with Adafruit_NeoPixel.
Upload the Code
Get the code by clicking "Download Project Zip" in the code listing below. Unzip the code into your Arduino project folder.
Plug your microcontroller into your computer with a USB cable. In the Arduino IDE, go to File -> Open to open the code file. Go to Tools -> Boards and select the name of the board: Adafruit QT PY (SAMD21). Then go to Tools -> Port and select the board there too. (If it's not showing up there, be sure your microcontroller is plugged into your computer via USB.)
Temporarily unable to load content:
Creating Color Palettes
FastLED Color Palettes
Using the FastLED library opens up a world of LED coding tools that are fairly easy to use.
There's a fantastic tool called PaletteKnife that works great for artist-minded people who think in colors instead of in code, and this project uses it.
Watch the video above for a demo of just how easy this is.
Want to try PaletteKnife and grab some new color palettes?
Here's what you'll definitely need:
Basically, you browse to the color palette that you want, and click PaletteKnife (a bookmarklet) in your browser. Then you COPY the resulting code and PASTE it into your FastLED animation source code.
Full instructions on how to get started with PaletteKnife are here: http://fastled.io/tools/paletteknife/
Electronics Assembly
Solder the headers to the top / front of the QT Py. The easiest way to do this is to place the headers into a solderless breadboard with the short ends up, and set the QT Py on top upside-down, so you're soldering to the back of the board.
The QT Py will plug in to the female headers on bottom of the BFF. Be sure the USB port on the QT Py is aligned with the 2.1mm jack. Double check that the pins are lining up correctly -- it's easy to mix this up and you can damage your board if you plug it in backwards.
If you're new to header usage, check out our guide on how to solder headers.
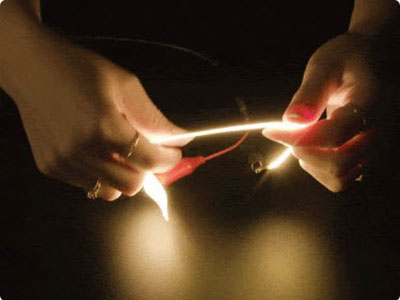
Cut your Stemma connector in half and strip some shielding from the yellow wire. Slip a piece of heat shrink on there.
The light strand has 3 wires: power, ground, and data. The data wire is directional: solder to the IN end and not the OUT end or it won't work.
My lights were helpfully labeled at the factory, but not all lights from all sources will be labeled, and they aren't always standardized. The only way to be sure you're getting it right is to test.
Alligator clips can be very helpful here -- make your connections temporarily and be sure everything works before your solder.
Testing is a little tricky here. We can't just hook the clips to a Circuit Playground Express running known good code, since these lights require 12v power. So, we'll need to test with our QT Py and BFF setup.
Connect the red and black alligator clips to wires coming from the screw terminal or 2.1mm jack on the BFF, and the data wire clip to the yellow wire on the stemma. If your lights don't come on, try connecting JUST the data wire to the other end of the strand.
Once I'd figured out which wire was which, I added some color-coding by soldering a red wire to the power (striped) wire on the connector, a yellow wire to the middle (data) wire, and a black wire to the remaining (g) wire. This way, it was easy to keep the wires straight once I got them inside the box.
If your power supply has a 2.1mm or another jack, cut it off. Thread the wires through one of the cable glands from the outside so the bare wire is inside the box.
Slip the 3 wires from your light strand's extra connector through the other cable gland. I attached a female connector to the box, since my IN end on my lights has a male connector.
Connect all the power wires to the BFF, using either the reconnected 2.1mm jack, or a male 2.1mm screw terminal, or the included screw terminals. It doesn't matter which way you connect the wires, just be sure both red wires are going to + and both black wires are going to -.
Splice the third (middle) wire from your connector to the yellow wire from the Stemma connector and plug it into the QT Py, then plug the QT Py into the BFF.
All wires accounted for? Double check once more that reds are going to + and blacks are going to -, then plug in your light strand and your power supply to light up your strand.
Splice the third (middle) wire from your connector to the yellow wire from the stemma connector and plug it into the QT Py, then plug the QT Py into the BFF.
All wires accounted for? Double check once more that reds are going to + and blacks are going to -, then plug in your light strand and your power supply to light up your strand.
Troubleshooting
If your lights don't come on or act strangely, here are some things to try:
Once it's all working, tighten the cable glands and close up the box with the included screws. I added some industrial Velcro to stick my box to my power supply and put zip ties on the inside and outside of the cable glands to add additional strain relief.